
 Thanks to this blog, I cook with a lot of butter these days, since there seem to be few colonial dishes that don’t have large quantities of butter either in them or poured on top. I got the idea for making butter from a book my daughter brought home from the library, Janis Herbert’s The American Revolution for Kids. All you do is put a cup of whipping cream in a large wide-mouthed glass jar with a tight-fitting lid, and shake it for about 10 minutes. The cream turns into whipped cream in about five minutes, then thickens into butter.
Butter making was obviously a little more involved in the 18th century. First, cow’s milk was set aside so that cream would form on top. The cream was then churned, usually in a plunge churn in which a stick (the “dasher”) was moved up and down inside a wooden or earthenware container. This agitation broke down the fat membranes in the cream, forming butter grains and, eventually, solid butter.
Churning took up to an hour or more. The butter was then kneaded by hand or with wooden paddles to extract any remaining milk, then rinsed and packed in barrels or cloth. As Lydia Child, author of The American Frugal Housewife (1835), instructed readers, “Pack your butter in a clean, scalded firkin [small barrel], cover it with strong brine, and spread a cloth all over the top, and it will keep good…”
According to Allison Aubrey of the NPR blog The Salt, old-fashioned butter churning is making a comeback. You can buy a hand-cranked churn on Amazon or from Lehman’s (an Ohio store that specializes in non-electric old-fashioned products), but they’re not cheap. What I really want, however, is a three-foot-tall antique plunge churn, but there’s not much room in our one-bedroom apartment for that! The jar method was fine but made only a small amount of butter, so I decided to try a stand-mixer recipe by chef Daniel Patterson from The New York Times Magazine. It worked beautifully, yielding two cups of fresh butter and about the same quantity of buttermilk.
Homemade Butter
Slightly adapted from recipe by Daniel Patterson in The New York Times Magazine
6 cups heavy cream, preferably organic
Salt to taste (optional)
1. Leave the cream out of the refrigerator briefly until it reaches a temperature of about 50°F, then put the cream into the bowl of a stand mixer fitted with a whisk. (A 5-quart bowl is just big enough.) Tightly cover the top of the bowl with plastic wrap, leaving no gaps — or, as Patterson writes, “it will look as if a milk truck exploded in your kitchen.”
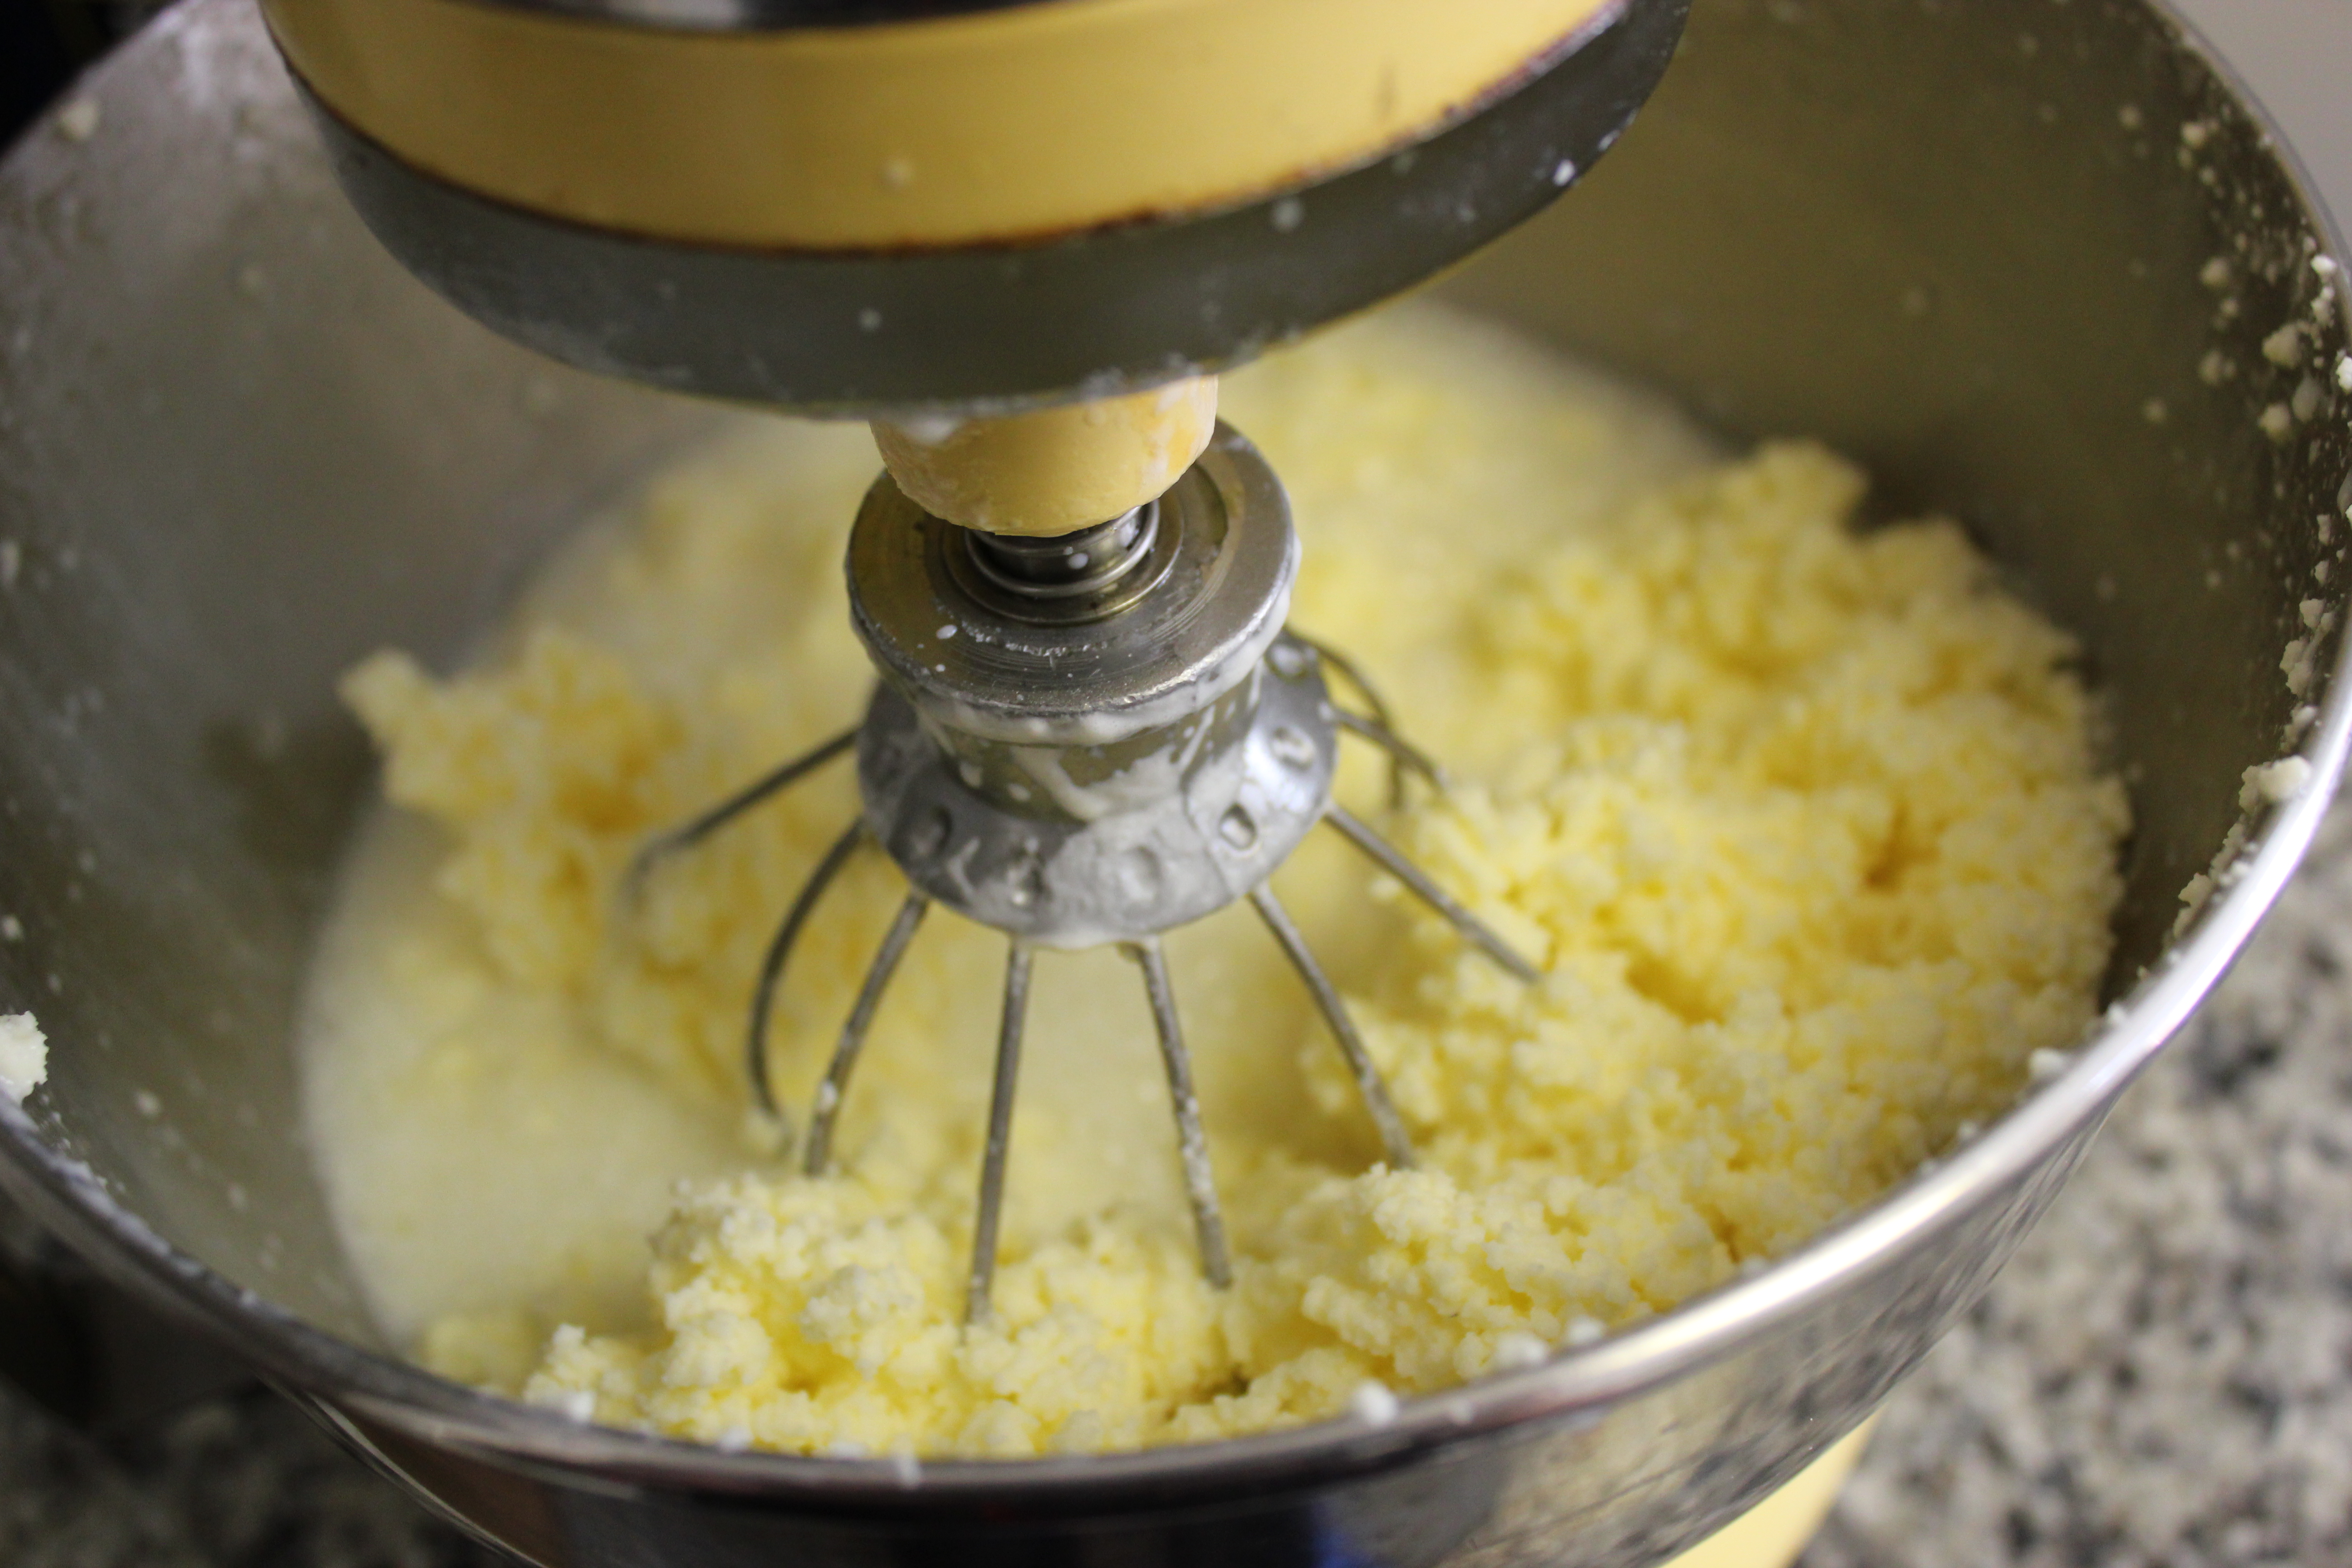
2. Start mixer on medium-high speed. In about 5 to 8 minutes the cream will thicken and turn pale yellow. It then reaches a pebbly stage, and a minute or two later the butter will separate and liquid will suddenly start splashing against the plastic wrap. When this happens, stop the mixer.
3. Put the contents of the mixer into a strainer set over a medium-sized bowl, and let the buttermilk drain through. Strain the buttermilk again through a fine-mesh sieve set over a smaller bowl, then set aside.
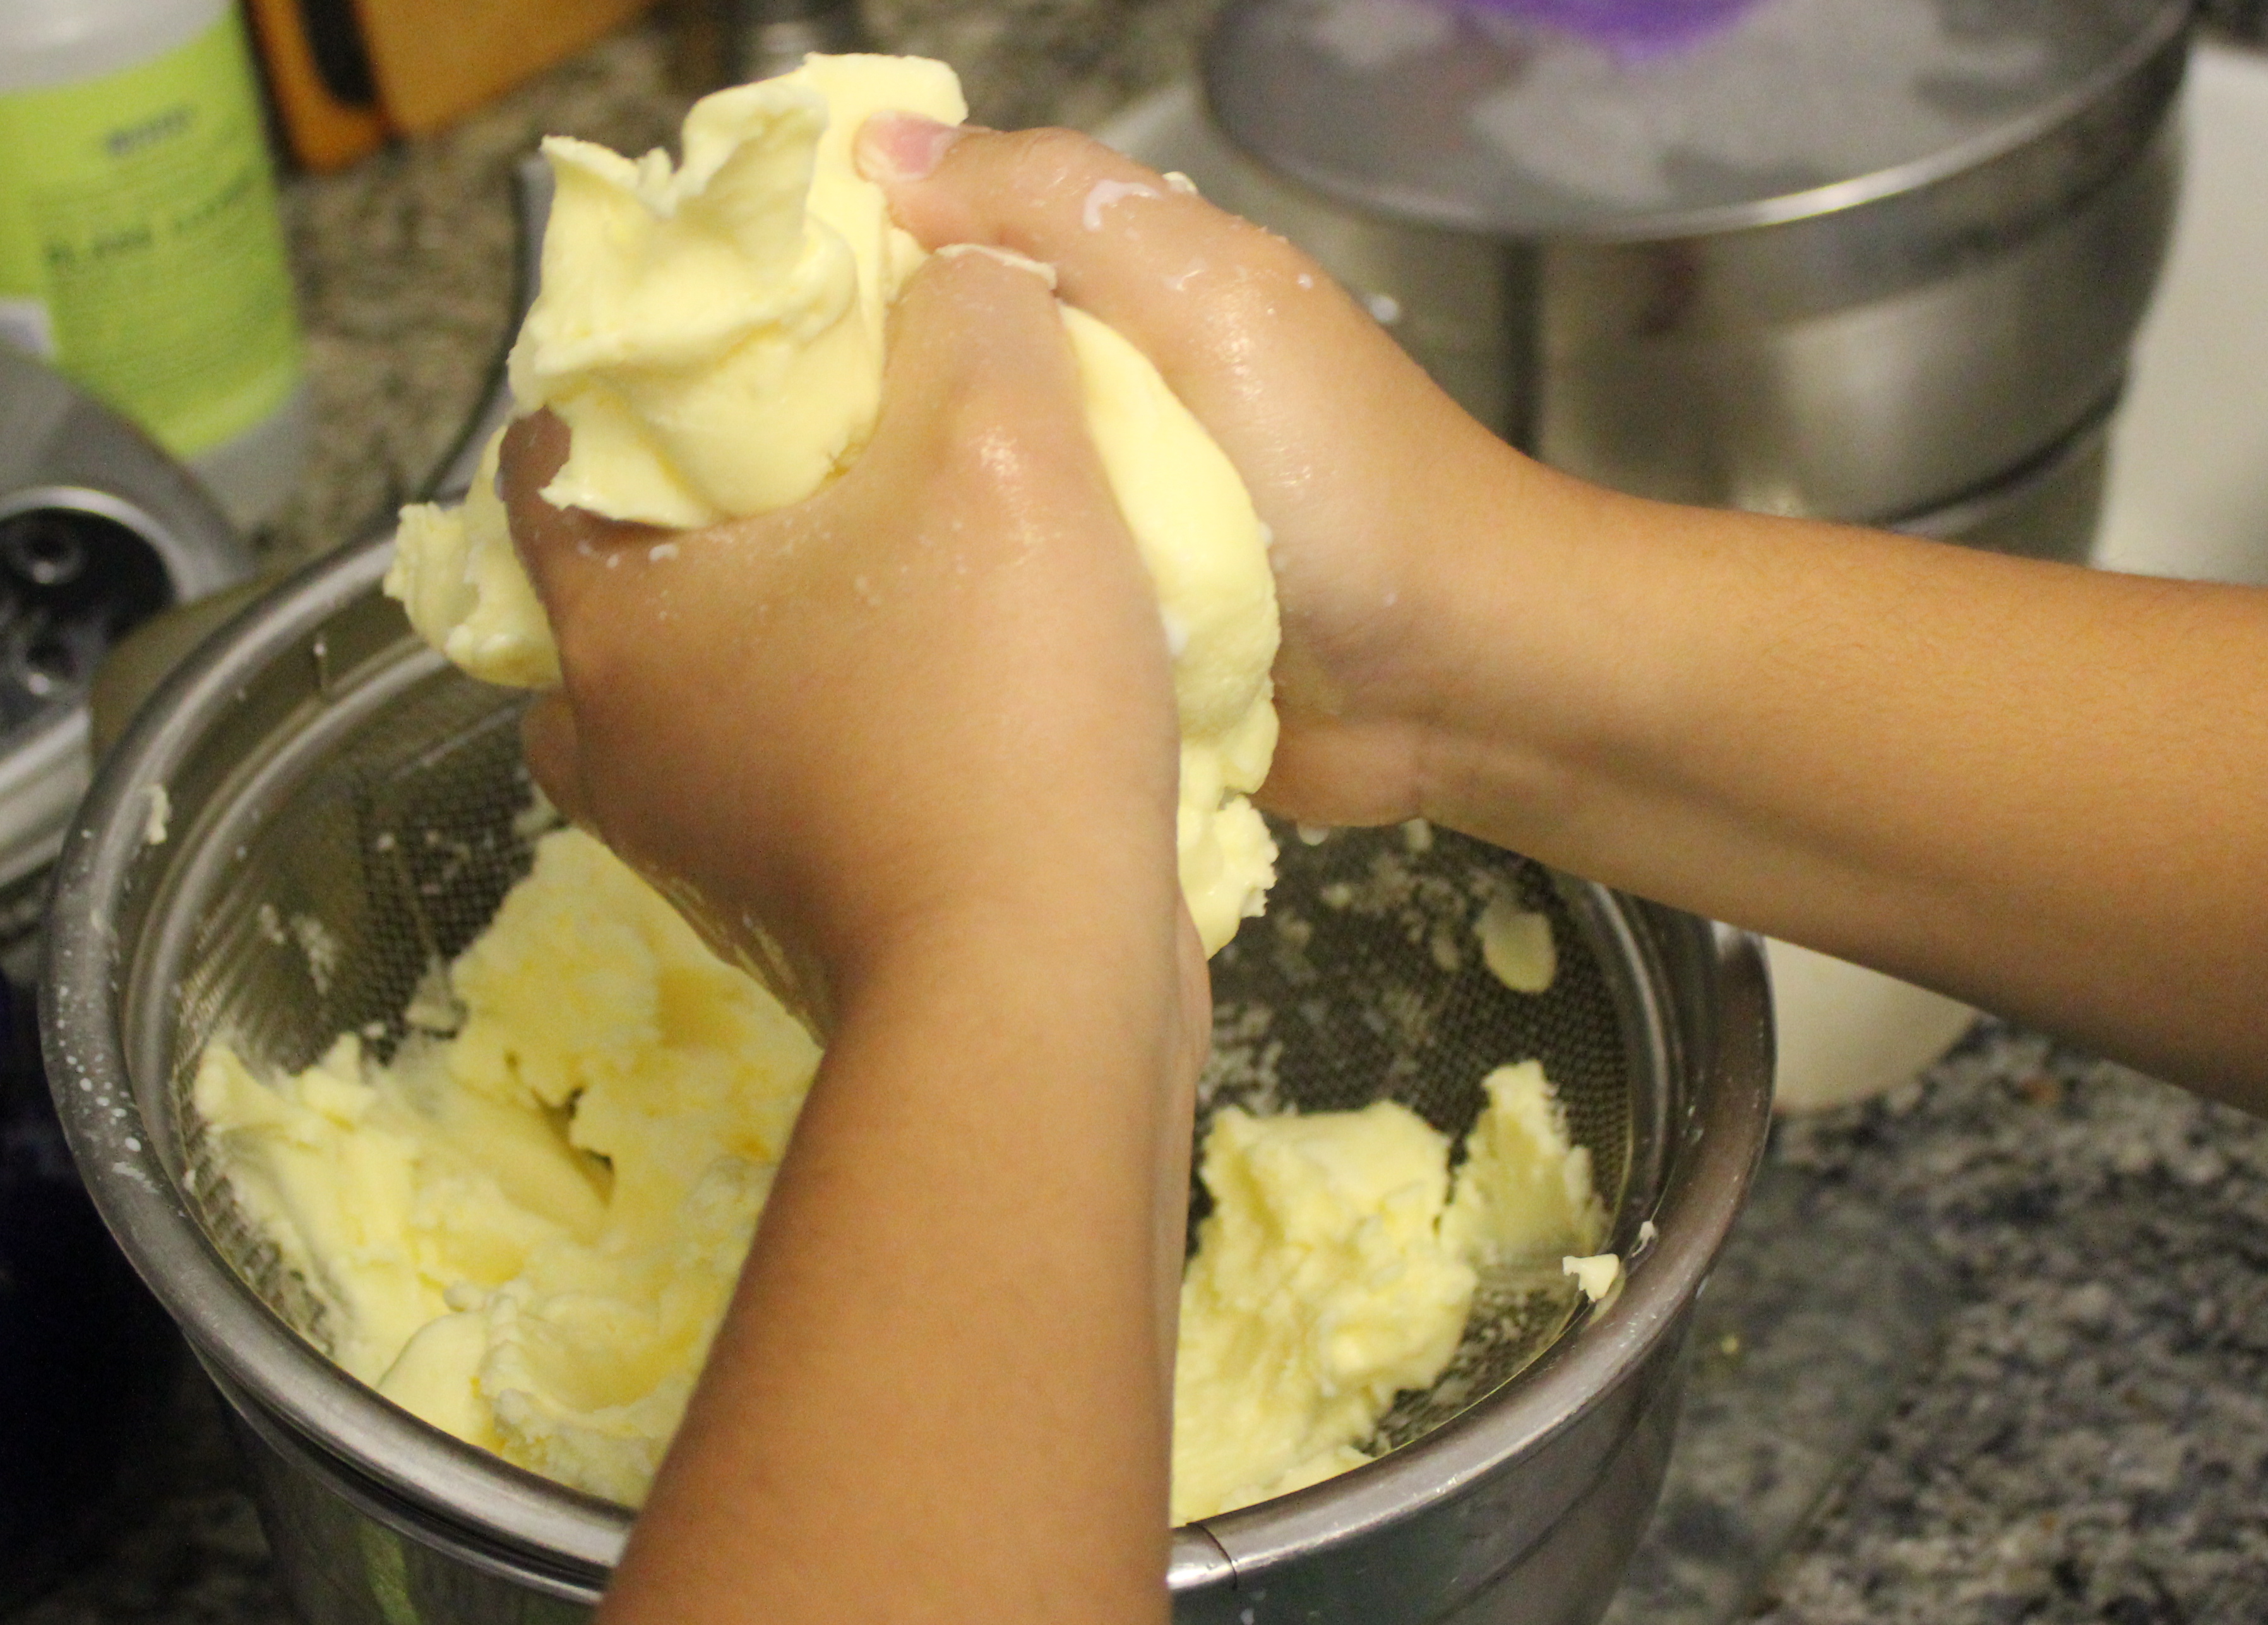
4. Knead the butter in the strainer set over the first bowl to extract any remaining liquid. (My daughter happily took on this task.) Keep kneading until the butter is dense and creamy, about 5 minutes. Try not to push the butter down onto the strainer — if you do, you may need to scrape butter off the underside of the strainer and knead it again.
5. Strain the extracted liquid into the set-aside buttermilk and refrigerate.
6. Mix salt into the butter, if you wish. (I added about 1/2 teaspoon salt to half of the butter and left the rest unsalted.) Transfer to an airtight container and refrigerate.

That butter looks great! Co-incidentally I made butter on the weekend – by accidentally over whipping cream for my dessert. I just carried on whipping to get to butter consistency – then separated the butter from the buttermilk.
So nice to have it home made!
I will try the “proper” recipe next!
I’ve also overwhipped cream before — it’s nice to do it on purpose for a change. Very liberating! 🙂
Mmmmm…. that butter looks irrationally appealing! in the sage words of Claudette Colbert “It took me years to figure out that you don’t fall into a tub of butter, you jump for it”.
And yet she somehow managed to squeeze into a dress with an 18-inch waistline…
A few tips for better butter-making: 1. wash your butter by kneading it in a bowl of cold water, so that all the buttermilk gets worked out and washed away. Change the water (dump the butter into a strainer set over the sink, then put the drained butter back in the bowl and cover with fresh water) when it becomes milky-looking, and when the water stays clear, you know you’ve gotten out all the buttermilk. Usually it takes 1 to 2 changes of water. The buttermilk will go rancid much faster than the rest of the butter, and the butter will absorb the rancid flavor and be ruined (unless you use it up really quickly).. 2. avoid kneading the butter with your hands, unless your hands are ice-cold. The heat of your hands melts the butter and any melted butter drips away with the buttermilk. Instead, use a couple of wooden spoons, or knead the butter by hand in a bowl of ice water. Then, let the lump of butter sit in a strainer for the water to drain off before using. 3. the temperature of the cream makes a big difference when making butter; too cold and it will take a long time to come together; too hot and it won’t solidify enough to make butter at all. Basically, you want it to be about room temperature: anywhere between 50 and 70 degrees. In the winter, set your cream container in a bowl of warm water (unless you heat the house above 75 degrees) to get to the right temperature. 4. You can also make butter in a blender, if you don’t have a mixer (like I don’t!).
Thanks for all the tips, Elizabeth, especially the washing advice. I thought 50 to 60 degrees was the proper temperature range for the cream, but it sounds like you have a lot more experience with this than I do. And good to know that you can make butter in a blender, too!
You’re welcome, and I hope the tips really help! I work at a history museum where we make butter with visiting schoolchildren at least twice a week, and my mom is a kindergarten teacher at a school 3 blocks from my house, and I make butter with her kids every year. I’ve gotten a good amount of practice over the years! Also, (another tip) if you can, use non-homogenized cream instead of regular; it seems to make the cream separate into butter and buttermilk much easier, although it does work consistently with the regular heavy cream. The non-homogenized cream is hard to find, though. Regular cream that is close to or just past its sell-by date (but not moldy or rancid yet) makes butter faster than fresher (pasteurized, homogenized) cream … don’t really know why that is, but there you go! You can buy cream that is close to its sell-by date and freeze it, and it is perfectly good for making butter with when you defrost it later. That’s what we do at the museum …
Wow. I didn’t know it was this easy. Crazy how easy it is. How did it taste? I might need to try this with fresh cream from the farmer’s market.
It tasted nice and fresh but it’s not as tangy as cultured butter — for that you need to use raw cream or to culture cream with butter cultures or yogurt. Thekitchn.com has a great post on making cultured butter:
http://www.thekitchn.com/how-to-make-butter-and-cultured-butter-cooking-lessons-from-the-kitchn-194372
Definitely use farmer’s market cream! I have to confess that I used part regular cream, part organic to save money. Next time I’m using only the good stuff.
I’m definitely going to try it. Seems like a fun domestic experiment. And I plan on useing tons of butter, with the holidays coming up! 🙂
Thanks Karen! Will def try. Now your next step is making clarified butter (ghee). Not very colonial but a very useful ingredient.